Container Networking is simple! Just kidding, it's not 🙈 But this series will help you understand it! It starts from a very thorough step-by-step guide on how to reproduce a single-host container networking using only standard Linux tools. Then it moves to higher-level concepts such as proxy sidecars and service discovery, and finally touches upon cross-host container networking in Kubernetes.
Mastering Container Networking
Learning Series
Container Networking Is Simple!
Just kidding, it's not... But fear not and read on!
Working with containers always feels like magic. In a good way for those who understand the internals and in a terrifying - for those who don't. Luckily, we've been looking under the hood of the containerization technology for quite some time already and even managed to uncover that containers are just isolated and restricted Linux processes, that images aren't really needed to run containers, and on the contrary - to build an image we need to run some containers.
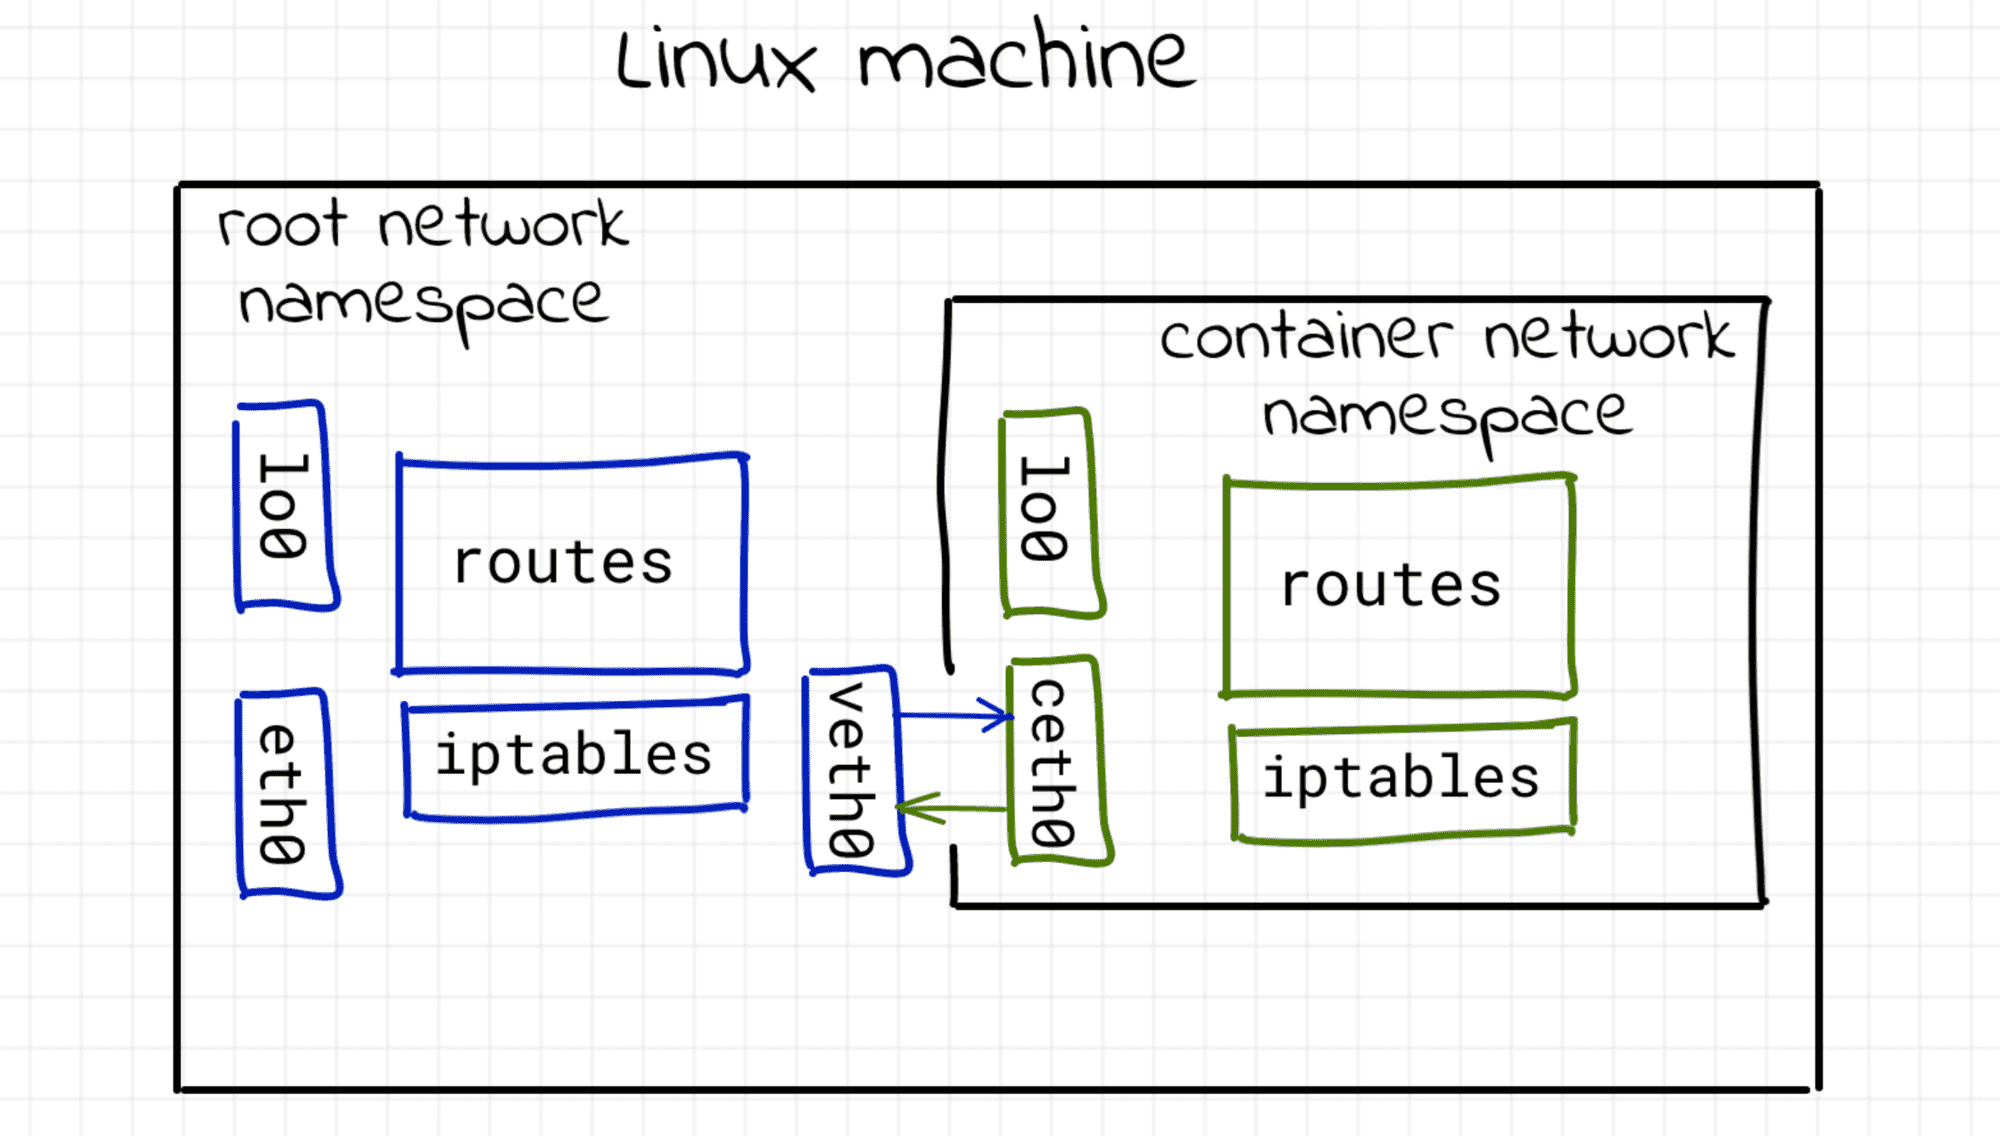
Now comes a time to tackle the container networking problem. Or, more precisely, a single-host container networking problem. In this article, we are going to answer the following questions:
- How to virtualize network resources to make containers think each of them has a dedicated network stack?
- How to turn containers into friendly neighbors, prevent them from interfering, and teach to communicate well?
- How to reach the outside world (e.g. the Internet) from inside the container?
- How to reach containers running on a machine from the outside world (aka port publishing)?
While answering these questions, we'll setup a container networking from scratch using standard Linux tools. As a result, it'll become apparent that the single-host container networking is nothing more than a simple combintion of the well-known Linux facilities:
- network namespaces;
- virtual Ethernet devices (veth);
- virtual network switches (bridge);
- IP routing and network address translation (NAT).
And for better or worse, no code is required to make the networking magic happen...
What Actually Happens When You Publish a Container Port
If you're dealing with containers regularly, you've probably published ports many, many times already. A typical need for publishing arises like this: you're developing a web app, locally but in a container, and you want to test it using your laptop's browser. The next thing you do is docker run -p 8080:80 app
and then open localhost:8080
in the browser. Easy-peasy!
But have you ever wondered what actually happens when you ask Docker to publish a port?
In this article, I'll try to connect the dots between port publishing, the term apparently coined by Docker, and a more traditional networking technique called port forwarding. I'll also take a look under the hood of different "single-host" container runtimes (Docker Engine, Docker Desktop, containerd, nerdclt, and Lima) to compare the port publishing implementations and capabilities.
As always, the ultimate goal is to gain a deeper understanding of the technology and get closer to becoming a power user of containers. Let the diving begin!
How To Publish a Port of a Running Container
The only "official" way to publish a port in Docker is the -p|--publish
flag of the docker run
(or docker create
) command. And it's probably for good that Docker doesn't allow you to expose ports on the fly easily. Published ports are part of the container's configuration, and the modern infrastructure is supposed to be fully declarative and reproducible. Thus, if Docker encouraged (any) modification of the container's configuration at runtime, it'd definitely worsen the general reproducibility of container setups.
But what if I really need to publish that port?
For instance, I periodically get into the following trouble: there is a containerized Java monster web service that takes (tens of) minutes to start up, and I'm supposed to develop/debug it. I launch a container and go grab some coffee. But when I'm back from the coffee break, I realize that I forgot to expose port 80 (or 443, or whatever) to my host system. And the browser is on the host...
There are two (quite old) StackOverflow answers (1, 2) suggesting a bunch of solutions:
- Restart the container exposing the port, potentially committing its modified filesystem in between. This is probably "the right way," but it sounds too slow
and boringfor me. - Modify the container's config file manually and restart the whole Docker daemon for the changes to be picked up. This solution likely causes the container's restart too, so it's also too slow for me. But also, I doubt it's future-proof even though it's kept being suggested 9 years later.
- Access the port using the container's IP address like
curl 172.17.0.3:80
. This is a reasonable suggestion, but it works only when that container IP is routable from the place where you have your debugging tools. Docker Desktop (or Docker Engine running inside of a vagrant VM) makes it virtually useless. - Add a DNAT iptables rule to map the container's socket to the host's. That's what Docker Engine itself would do had you asked it to publish the port in the first place. But are you an iptables expert? Because I'm not. And also, it has the same issue as the above piece of advice - the container's IP address has to be routable from the host system.
- Start another "proxy" container in the same network and publish its port instead - finally, a solution that sounds good to me ❤️🔥 Let's explore it.
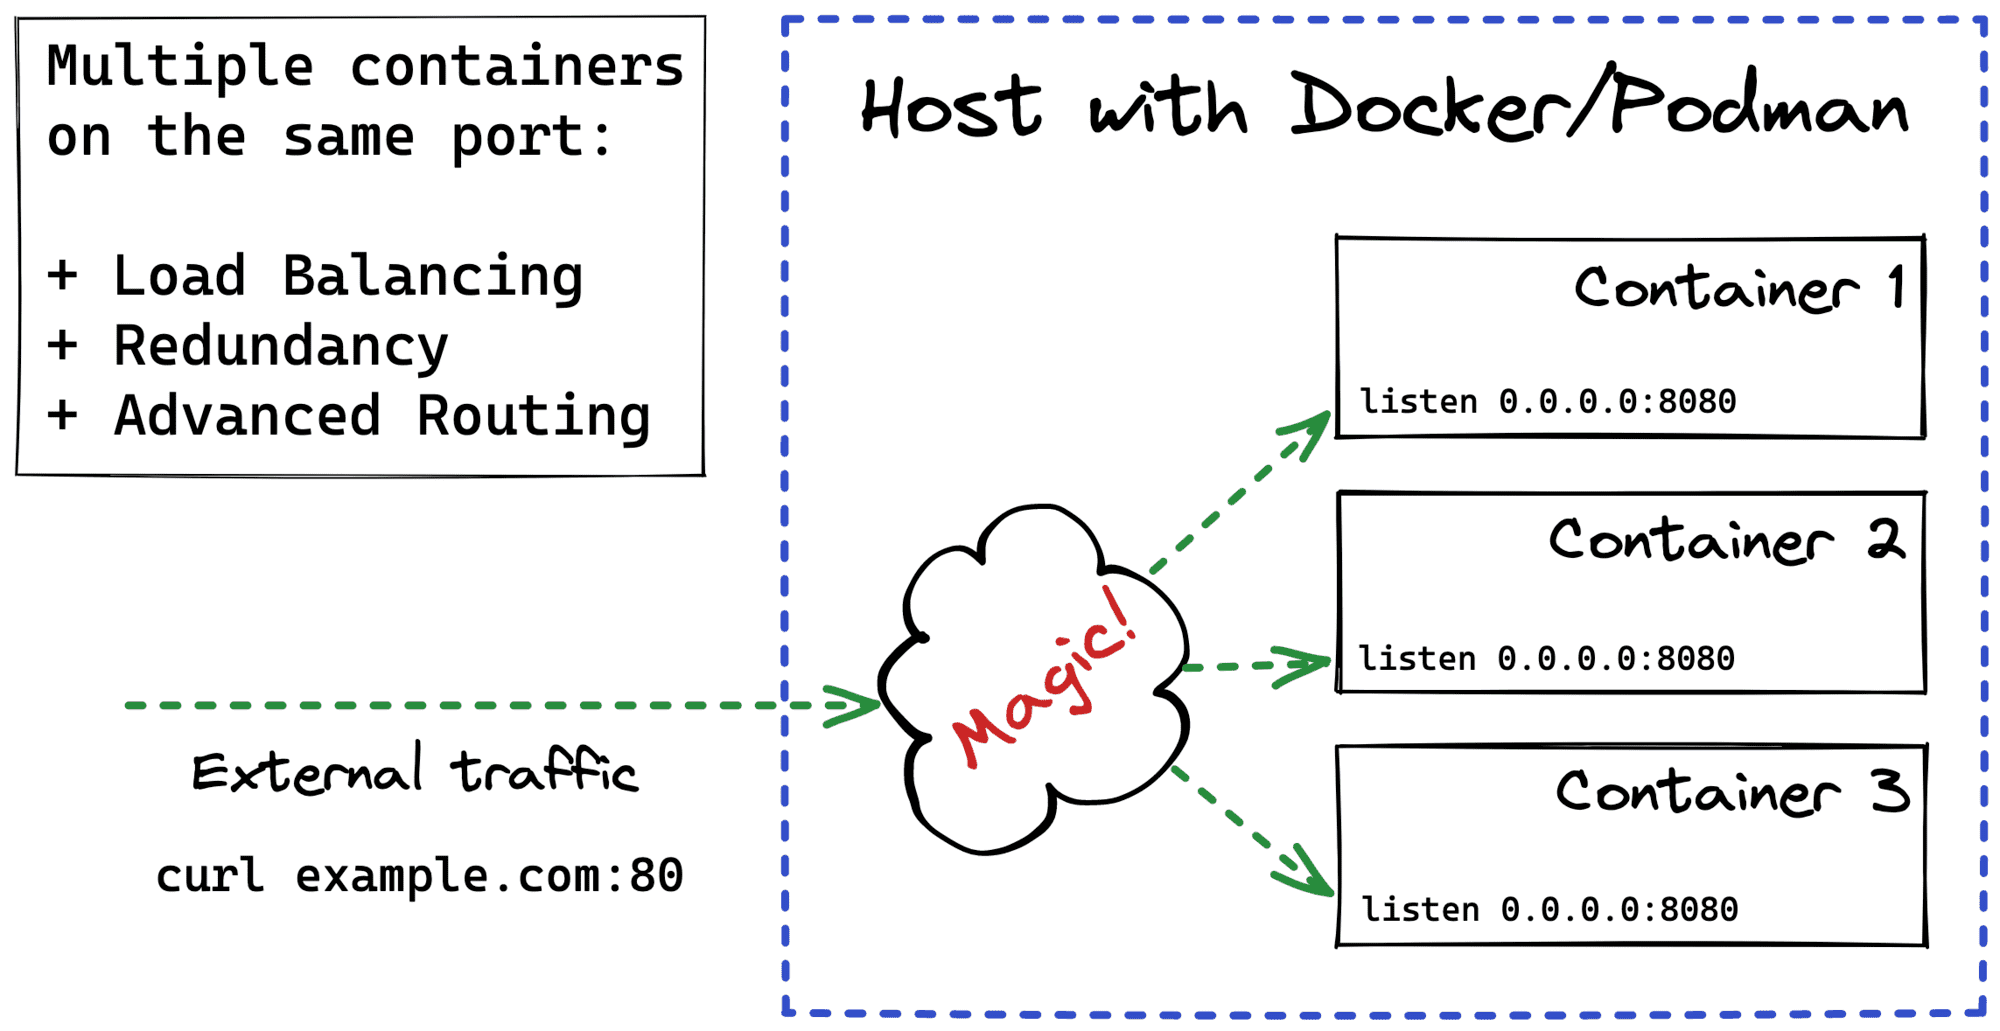
Multiple Containers, Same Port, no Reverse Proxy...
Even when you have just one physical or virtual server, it's often a good idea to run multiple instances of your application on it. Luckily, when the application is containerized, it's actually relatively simple. With multiple application containers, you get horizontal scaling and a much-needed redundancy for a very little price. Thus, if there is a sudden need for handling more requests, you can adjust the number of containers accordingly. And if one of the containers dies, there are others to handle its traffic share, so your app isn't a SPOF anymore.
The tricky part here is how to expose such a multi-container application to the clients. Multiple containers mean multiple listening sockets. But most of the time, clients just want to have a single point of entry.
Service Proxy, Pod, Sidecar, oh my!
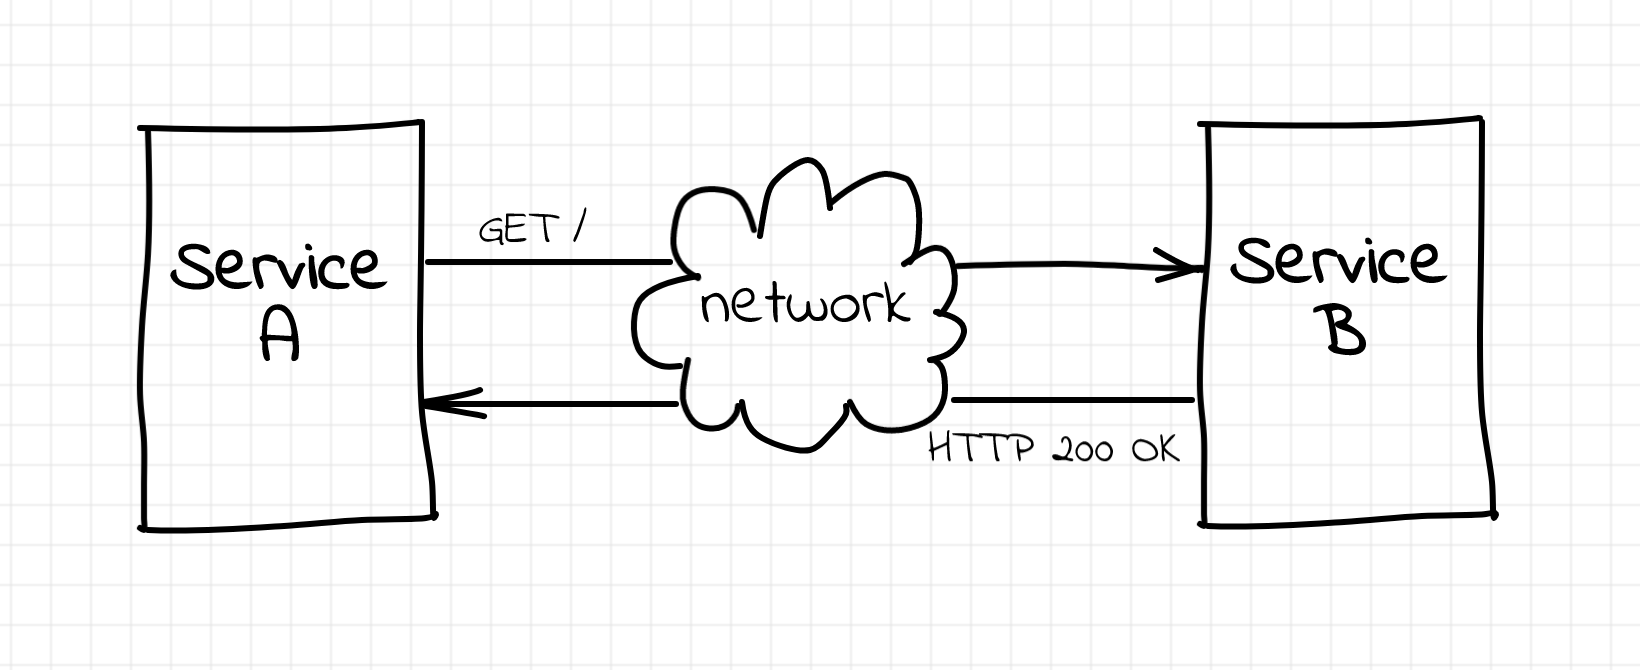
How services talk to each other?
Imagine you're developing a service... For certainty, let's call it A. It's going to provide some public HTTP API to its clients. However, to serve requests it needs to call another service. Let's call this upstream service - B.
Obviously, neither network nor service B is ideal. If service A wants to decrease the impact of the failing upstream requests on its public API success rate, it has to do something about errors. For instance, it could start retrying failed requests.
Service Discovery in Kubernetes: Combining the Best of Two Worlds
Before jumping to any Kubernetes specifics, let's talk about the service discovery problem in general.
What is Service Discovery
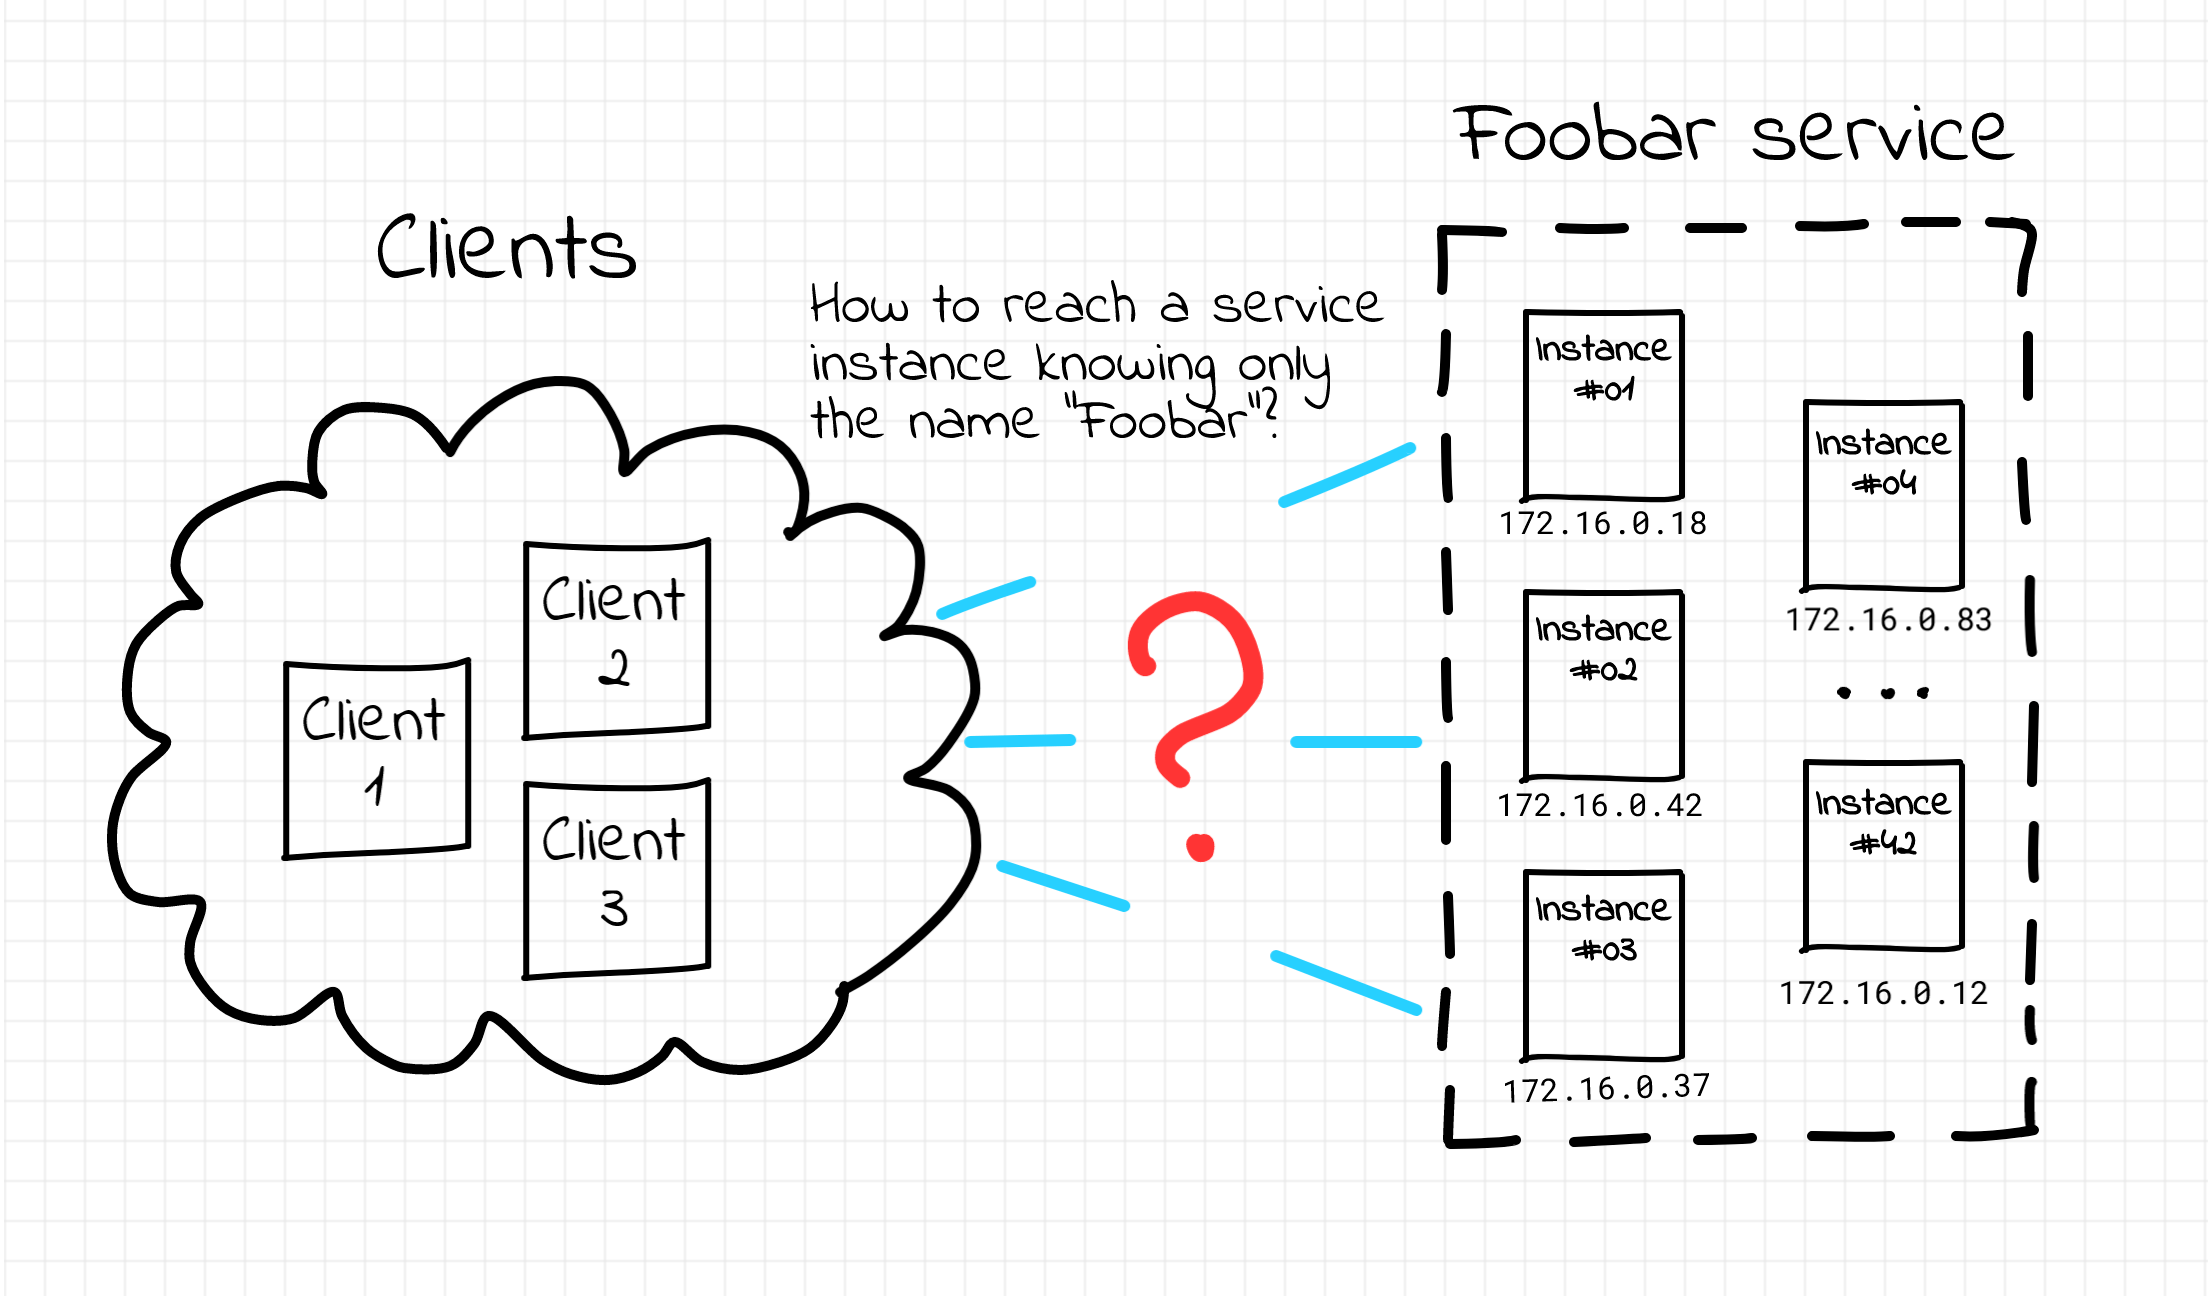
In the world of web service development, it's a common practice to run multiple copies of a service at the same time. Every such copy is a separate instance of the service represented by a network endpoint (i.e. some IP and port) exposing the service API. Traditionally, virtual or physical machines have been used to host such endpoints, with the shift towards containers in more recent times. Having multiple instances of the service running simultaneously increases its availability and helps to adjust the service capacity to meet the traffic demand. On the other hand, it also complicates the overall setup - before accessing the service, a client (the term client is intentionally used loosely here; oftentimes a client of some service is another service) needs to figure out the actual IP address and the port it should use. The situation becomes even more tricky if we add the ephemeral nature of instances to the equation. New instances come and existing instances go because of the non-zero failure rate, up- and downscaling, or maintenance. That's how a so-called service discovery problem arises.
Service discovery problem.
Traefik: canary deployments with weighted load balancing
Traefik is The Cloud Native Edge Router yet another reverse proxy and load balancer. Omitting all the Cloud Native buzzwords, what really makes Traefik different from Nginx, HAProxy, and alike is the automatic and dynamic configurability it provides out of the box. And the most prominent part of it is probably its ability to do automatic service discovery. If you put Traefik in front of Docker, Kubernetes, or even an old-fashioned VM/bare-metal deployment and show it how to fetch the information about the running services, it'll automagically expose them to the outside world. If you follow some conventions of course...
Don't miss new posts in the series! Subscribe to the blog updates and get deep technical write-ups on Cloud Native topics direct into your inbox.